Having virtual space is the need of the hour. Be it in your life or on your PC. While in personal life, it is not possible to have that liberty, to create a virtual space in your PC very easy. Before delving deep, let’s first understand more about virtualization.
What is Virtualization?
Well, that sounds a bit trippy, isn’t it? However, in reality, it is much simple than that. In simpler terms, virtualization software is something that enables you to use two or more operating systems on the same computer/laptop. It creates a second virtual environment. In other words, it is as if two or more PCs getting packed into one, one is virtual, and the other physical.
Virtualization On Windows 10
Virtualization software is also known as hypervisor it enables your PC or server to host two or more operating systems.
Basic Hardware Requirements to Enable Virtualization on Windows 10
Check Hardware Requirements to Enable Virtualization
To enable virtualization there are certain requirements that your PC needs to fulfill. Those include the following.
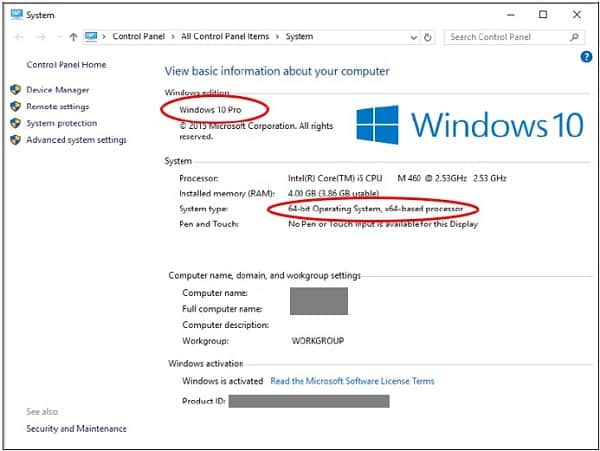
- Windows 10 (Pro, Enterprise or Education version)
- 64-Bit processor (with SLAT)
- 4GB or more RAM
- BIOS set up with virtualization option enabled
- Sufficient space in the Hard Drive
Check Whether Your PC Supports Hardware Virtualization
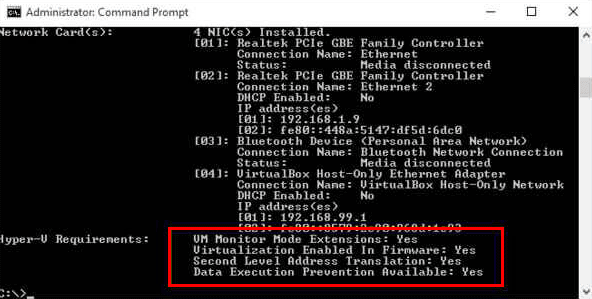
Before proceeding further, you need to make sure that your PC supports hardware virtualization. Following is the procedure to check that:
- Open “Command Prompt” on your PC
- Enter command “exe”
- Your PC will take a few seconds before it displays the results
- Search for “Hyper-V requirements”
- Make sure that “Virtualization Enabled In Firmware” reads “Yes”
Check whether your PC supports Hardware Virtualization
You can also check whether Virtualization is enabled in the task manager under “Performance Tab.”
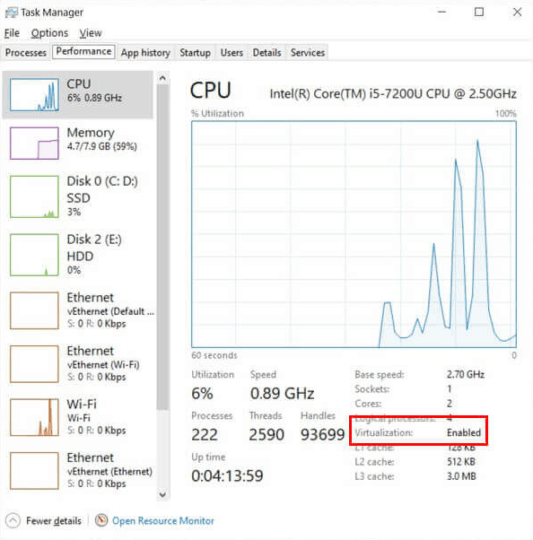
Performance Tab showing hardware Virtualization enabled
Your screen will display whether it is enabled or not. By default, it is enabled. However, in case of Virtualization is disabled, you may enable it by BIOS or UEFI.
How To Enable Virtualization In BIOS On Windows 10?
BIOS basically is a tiny program, which starts running in the background as soon as you put on your PC/laptop. Apart from handling some advanced functions that you need to enable separately, the main function of BIOS is to ensure safe booting of your device and ensure that all things are working smoothly. Virtualization is one of those.
Following are the steps to enable virtualization:
- Restart your computer and enter the BIOS setup. This is done by pressing a key just as the computer is turned on. The key you have to press varies from one system to another, but it usually is F2, F10, or Delete.
Most systems tell you which key to press to enter the setup, or you can consult your computer manual, it shall help.
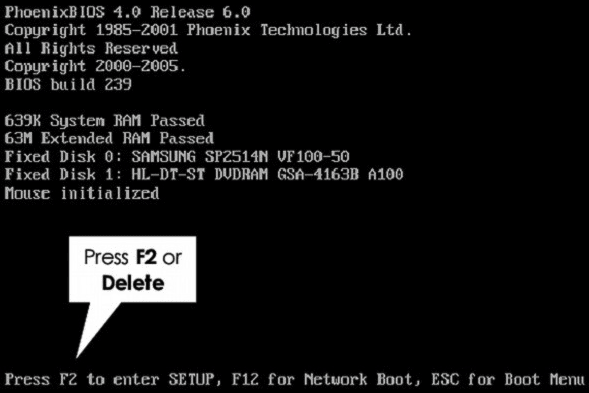
Press F2 to enter BIOS setup
- Once you have entered BIOS, all you need to do is enable all settings of Virtualization.
Note: BIOS setup may be different in different brands.
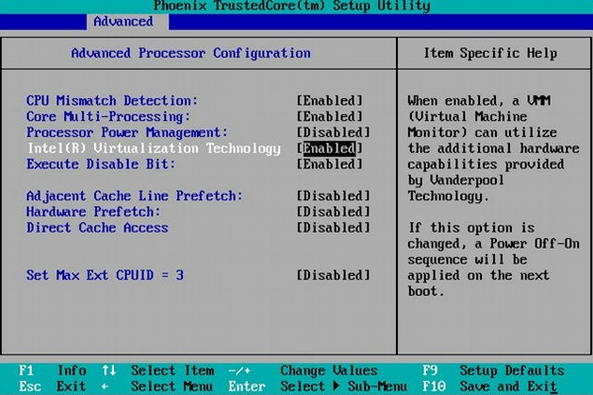
Enable all settings of Virtualization
- Once you enable all the settings, select “save and Exit” from the bottom right. You may press the “F10” button to do the same. This will restart your PC/laptop.
What Is Hyper-V and How to Activate Hyper-V?
Hyper-V is the platform used by Windows to handle virtualization. You have to make sure that it is activated before adding virtual machines to your PC.
The features offered by Hyper-V mot only enable you to run the operating system but also allows you to control the hardware components of your system like those of network switches and hard disks. With a bit of training, server virtualization can be done too.
This is how you can activate Hyper-V:
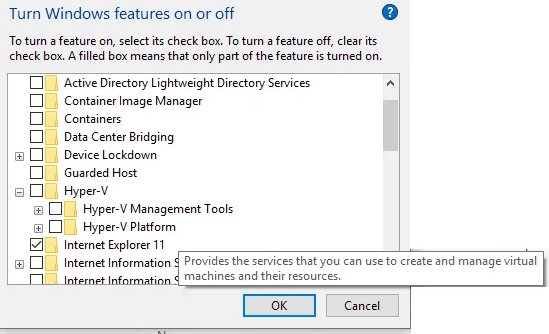
- Go to Programs and Features from your Control Panel.
- Then go to “Turn Windows Features On or Off.”
- There you will see the Hyper-V folder.
- “Tick” both the sub-folders you will see on the screen and then “OK” on the bottom right.
Tick all folders under Hyper-V
- Windows will ask for a restart to configure Hyper-V and make the required changes to your system.
Allow restart and you are done.
How To Create Virtual Space Using Hyper-V
Once you are done with enabling of Hyper-V, you are now ready to create a virtual machine on your PC by performing the following steps:
- Got to control panel of your PC and tap on “Administrative tools”
- You will find the Hyper-V manager. Click on that as shown in the figure below
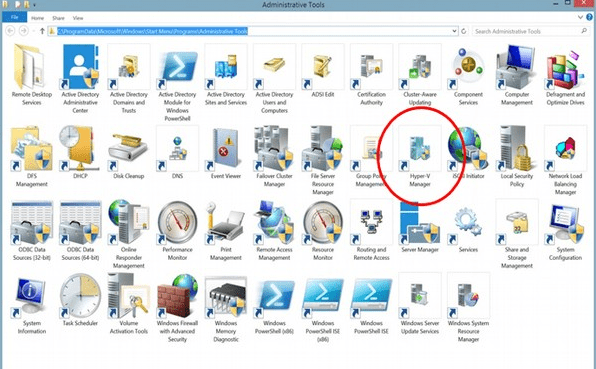
Click on “Hyper-V” in “Administrative Tools”
It will start Hyper-V and the name of your PC will be visible on the top left corner as shown below.
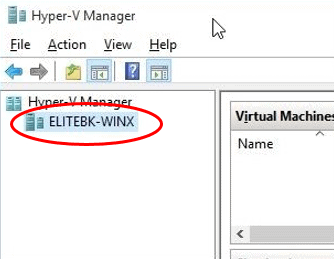
Name of your PC will be visible on the top left corner
- Go to the “Action” menu and on the top left corner and select “New “and the “Virtual Machine.”
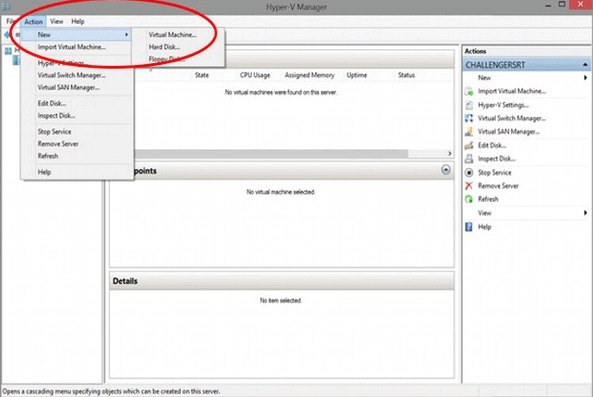
Select Action>New>Virtual machine
Alternatively, you may do the same using the sidebar that is on the right of the application and launch “Actions.”
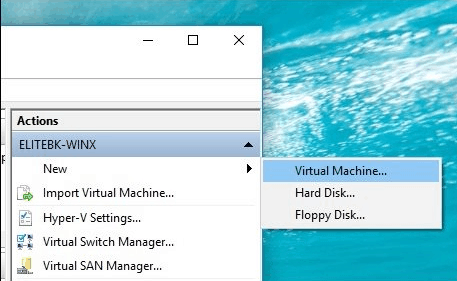
Launch “Actions” from the sidebar and select the option
Clicking on the “Virtual Machine” will take to a page as shown below. Here you can create your virtual machine by clicking on the “Finish” button. However, this will create a virtual space with limited configurations.
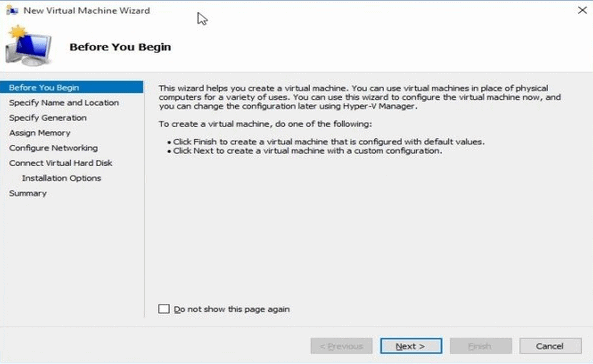
Click on “Next” for advanced settings
- If you want to explore and create something very advanced, click on “Next” and advanced options will be at your disposal.
Once the virtual machine gets created, it can be seen in the Hyper-V window. You may now add the operating system of your choice to it. You can turn it on and off using the tabs given on the bottom right of your window.
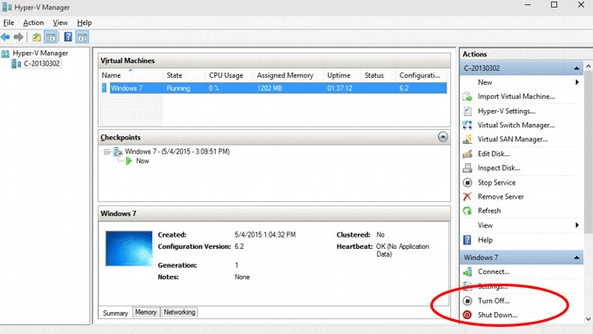
Click on Turn off and Shut down
Following the above simple steps will allow you to create a virtual machine on your PC and you will have a number of options to explore at your disposal. Do keep in mind that BIOS and Hyper-V look different in different brands. It is always good to refer your computer manual in case you come across any problem.
- Get McAfee Antivirus for free.
- Download Gameloop For MAC
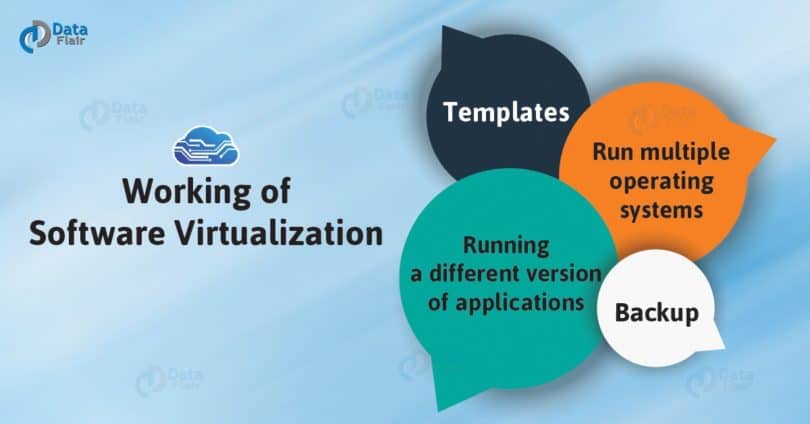
Benefits of Virtualization
With the same amount of hardware your PC has, virtualization enables you to install and run more software and applications. In other words, it enables you to “do more.”
- It eases the backup process of the operating system as well as installing it. In simple words, if your mail server gets hacked, unfortunately, you can still restore the older version very easily.
- You have the flexibility to use Windows as well as Linux if you are bored of using the same OS every day.
- If you have recently upgraded to Windows 10 from Windows 8, it will still allow you to run the previously installed apps.
- It allows you to have a look at the files infected with the virus without opening them. You may do it by taking a snapshot of your PC before opening the files.
- You can try to install new apps in the virtual environment to see how it behaves with the existing software, before actually installing it.
- It gives you the flexibility to do things in an isolated environment and software testing.